Image Map

Giveaway

Re-Launch Coming Soon
Showing posts with label Hair. Show all posts

Monday, 24 August 2015

Beauty | Autumn Hair and Beauty Trends


Autumn Beauty Trends

The weather in the UK is so changeable at the moment one minute we have beautiful blue skies and it's a warm sunny day and the next there is a chill in the air and raindrops falling on our heads. I'm not ready for Summer to be over just yet and I'm really hoping we get a nice September as it's our wedding in three and a half weeks but controversially I'm also looking forward to Autumn arriving.

As the temperature cools and the pretty golden leaves drop from the trees it offers the perfect opportunity to re-discover your Autumn fashion and beauty favourite's that have been neglected over the Summer months. To me, it feels like shopping without having spending any money as it's also exciting finding products you forgot you had.

This has got me thinking about what hair and beauty trends will grace the pages of our favourite magazines and fill the windows of our favourite shops hoping to tempt us in. Here's what I think will be this years favourite's:


Highlights

When people say highlights they often think of Summer and brightening their hair because it's warmer outside but why not mix things up and do this during Autumn instead? A flash of blonde or auburn running through a hair style looks gorgeous and is perfect for this time of year because it mimics the changing colour's of the leaves on the trees and would look stunning with berry tones. Check out some products used to colour hair here.


Nails

I mentioned berry tones earlier and it's a must during Autumn for nails as well as red. It's a classic and one of my favourite looks which I repeat every year without fail. Sometimes red can be a bit daunting to wear but something deep and rich like Sinful Nail Polish in Dangerous is a great shade. I also love to wear purple if I feel like mixing things up a little and this Attitude Polish in Temptation is really pretty. To have a more unique look but still fit in with this trend why not try adding your own nail art such as a hint of gold sparkle?


Textured Hair

I love adding texture to my hair whether it be beachy waves or curls and although I do this all year round for some reason I tend to do this more in Autumn/Winter. This year I think this look will be popular rather than the sleek straight look but I think high gloss and choppy layers will also be common. A simple high ponytail with plenty of volume or a down do will be the look this year. You can add texture to your hair by using a variety of styling tools to create different looks.


Makeup

Smokey eyes are something I think will be big in Autumn this year, in particular grey, purple and cranberry looks (not necessarily combined). These colours shout Autumn to me as the party season approaches I think the smokey eye will become more popular with a defined black flick or shimmery brown/gold liner. The berry lip is always around during this time of year and I love this look but I think purple lip shades will be more popular. MAC Recently released a gorgeous new deep purple shade in a Limited Edition collection and it's only a matter of time until others follow suit.

I look forward to seeing how many of my predictions are true as Autumn approaches!


What do you think will be the Autumn Hair and Beauty Trends?

*
Check out these great blogs by my lovely advertisers:

Pink Champagne: Beky Lou
Pink Pearl:, Scottish Stef's Nails, 

To advertise with Kimberley's Beauty Blog find out more info here

Monday, 25 May 2015

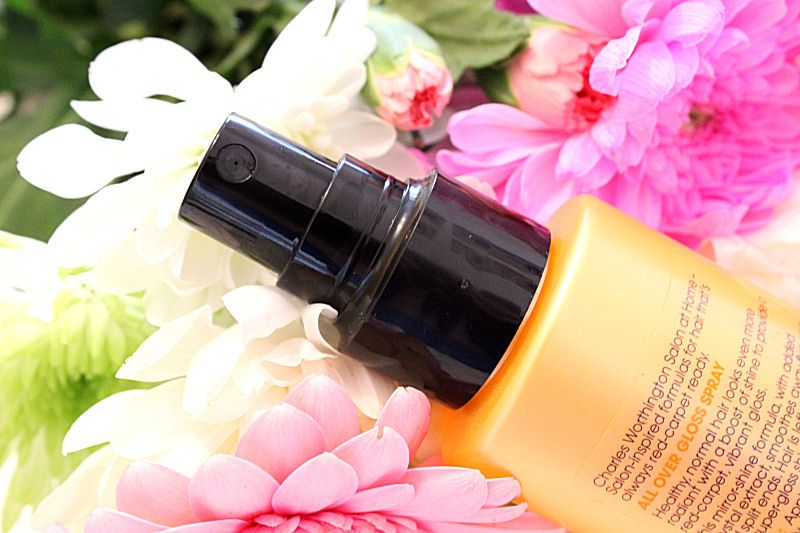
Review | Charles Worthington Shine Booster All Over Gloss Spray


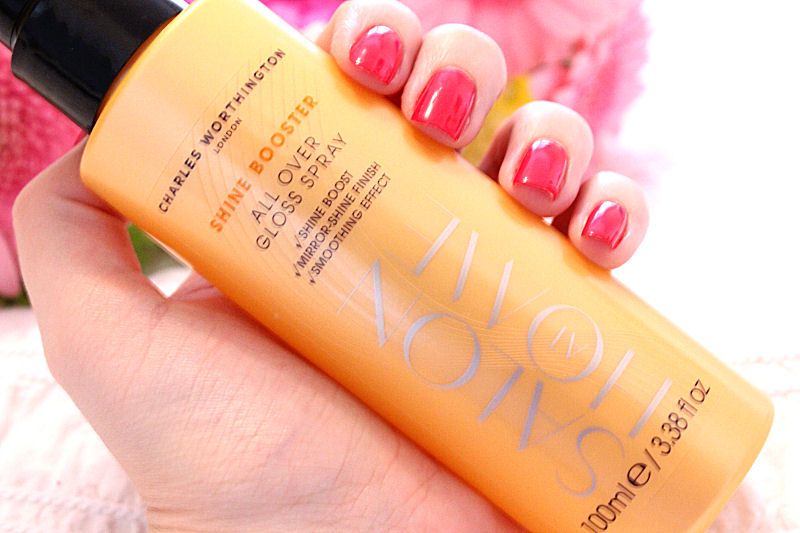
Charles Worthington Shine Booster All Over Gloss Spray

I love having glossy hair because the shine makes it look and feel healthy. It's something I've looked to achieve with my hair for years and have found a variety of products to help with this, some of which I have loved and others I haven't but my latest find is a good one.

The *Charles Worthington Shine Booster All Over Gloss Spray doesn't look like much in it's simple packaging but it definitely shouldn't be overlooked. This product is amazing. Not only does it smell gorgeous but without fail every time I use this product my Fiance comments on how shiny my hair looks.

This product is the perfect way to finish any hair style and I could easily get through bottles of it however it does have one down side. I find the spray is a little too direct so you often get a lot of product concentrated in one place rather than an even coverage all over. It's not ideal but as the product is so good it doesn't put me off... you just need to be careful you don't go overboard with the application and ensure you have the bottle far away from your hair so it doesn't get a soaking!

Overall, this is a really lovely product and I have already recommended it to some friends and family who are also going to give it a try!

If you want to try this Charles Worthington Gloss you can buy it from Boots for just £5.99

What do you think of this product? What are your tips for glossy hair?

Check out these great blogs by my lovely advertisers:

Pink Champagne: Beky Lou

To advertise with Kimberley's Beauty Blog find out more info here

Sunday, 8 February 2015

Review | Hot Hair Party Pony Review


Hot Hair Party Pony
Maybelline Dream Touch Blush in Peach
Hot Hair Party Pony

Today's blog post is all about a pretty hair piece I recently started using which is by Hot Hair. This isn't a brand I had heard of before but I've been pleasantly surprised at how good their hair pieces are and I would definitely recommend them.

The hair piece I have is called the *Party Pony and I love it. It makes my hair look long, thick and luscious plus it has a gorgeous shine. I'm always a little wary of using hair pieces because it's so hard to find a good colour match and texture but this one is perfect. My hair blends in really well and although the hair is synthetic the difference isn't really obvious.

The Party Pony is 14-17" in length and the style is very pretty for both day and evening looks. The main length of the pony tail is straight which turns into pretty curls at the end which look really natural and beautiful. It is also very easy to use. You simply create a pony tail with your own hair, insert the clip on the hair piece into the top where the hair tie is and wrap around the hair strand around the top, clipping it securely into place. This has a velco band on it which helps create the correct shape at the base of your pony tail and keep everything where ti should be.

I've been really impressed by this hair piece. It takes just seconds to grip into place plus it looks and feels really natural. In fact, people haven't even noticed it's not my own hair when I've worn this!

If you want to purchase this hair piece you can buy it from the Hot Hair website for £29.00 (currently reduced to £23.90). They also have lots of other styles available.

What do you think of the Party Pony hair piece from Hot Hair?

Check out these great blogs by my lovely advertisers:

Pink Champagne: Beky Lou

To advertise with Kimberley's Beauty Blog find out more info here

Friday, 9 May 2014

Review | TRESemme Oil Exlir


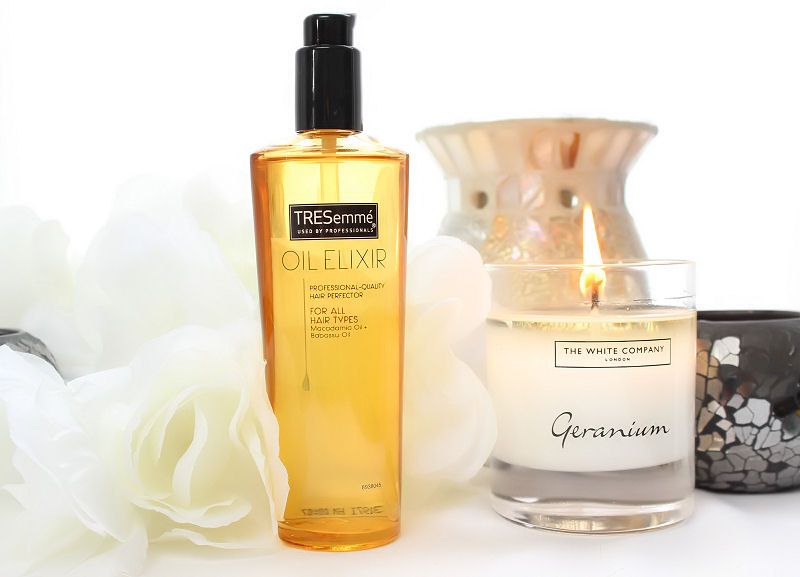
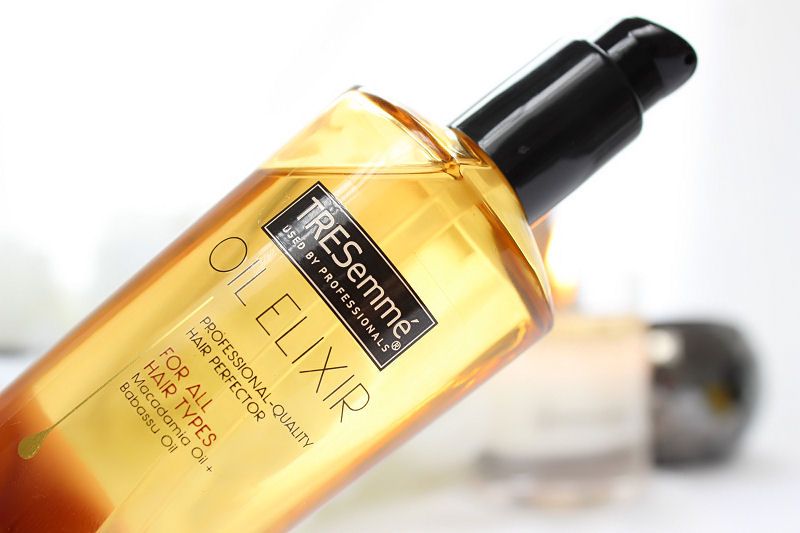
Tres Semme Oil Elixir Tres Semme Oil Elixir

Hello Beauties! I hope you're all well and enjoyed the bank holiday weekend if you're in the UK. Mine was a little up and down because on Friday after a visit to the doctors I was diagnosed with Post Viral Bronchial Spasms due to the bad coughing and chest pains I was experiencing. I've been given an inhaler which is helping but I still find it hard to breathe at times which is really horrible!  I still got to spend some time with my family and blogging which was really nice but missed out on a night out with friends because sadly I wasn't up to it.

Anyways, enough about my aliments and onto today's post....

I've been a fan of hair oils for a while because they feel like such a nourishing and luxurious product. I've tried a variety over the years and they really aid with keeping my long hair looking healthy which is great because I don't get it cut as often as I should (I hate losing the length) and I also use styling tools on my hair most days so my poor hair is subjected to heat on a regular basis. 

A recent addition to my hair care collection  is the *TRESemme Oil Elixir which sounds like a gorgeous product just from the name let alone anything else.  The packaging is sleek and simple which shows of the product to the full and the pretty gold liquid looks dreamy through the transparent casing.

TRESemme Oil Elixir is packed full of nourishing ingredients for the hair including the well known Macadamia Oil and Babussu oil which unlike what many people think do not leave your hair feeling greasy.  Instead it is the perfect treat to keep your hair looking good.  

The texture of this oil is light but not greasy or sticky and it is suitable for all hair types. Even though I have long hair I find applying just one pump works perfectly and I do this on both wet and dry hair starting half way down and concentrating mostly on the tips. I never apply hair oils to my roots.

After using this beautiful Elixir my hair is left feeling soft and it has a gorgeous shine. My hair looks healthier and the texture looks smooth but not flat. It is a really great product to use as a hair treatment but also to combat any frizz or flyaways and define curls.

In the past I have always sworn by my Moroccan Oil but the TRESemme Oil Elixir is a really great alternative to use. I find it works just as well and it is considerably cheaper priced at £9.99 in Boots. Once again TRESemme hasn't let me down.. this product is brilliant!

What do you think of the TRESemme Oil Elixir?
Check out these great blogs by my lovely advertisers:


To advertise with Kimberley's Beauty Blog find out more info here
Tuesday, 29 April 2014

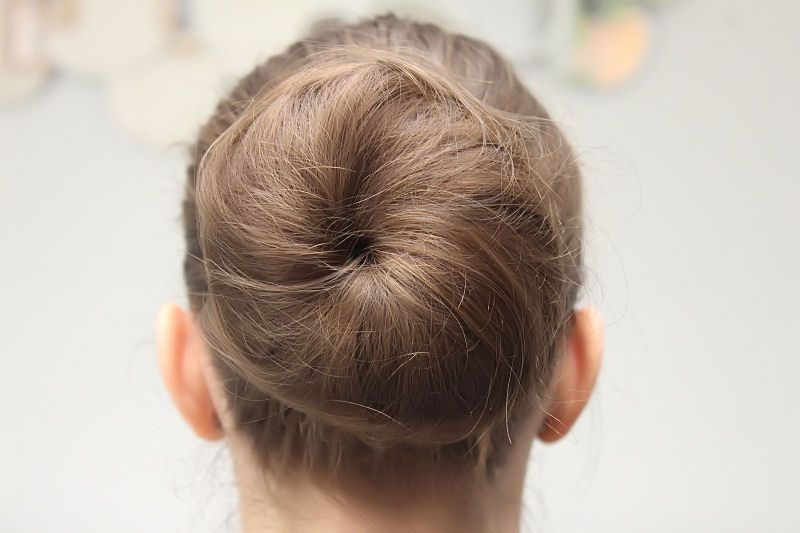
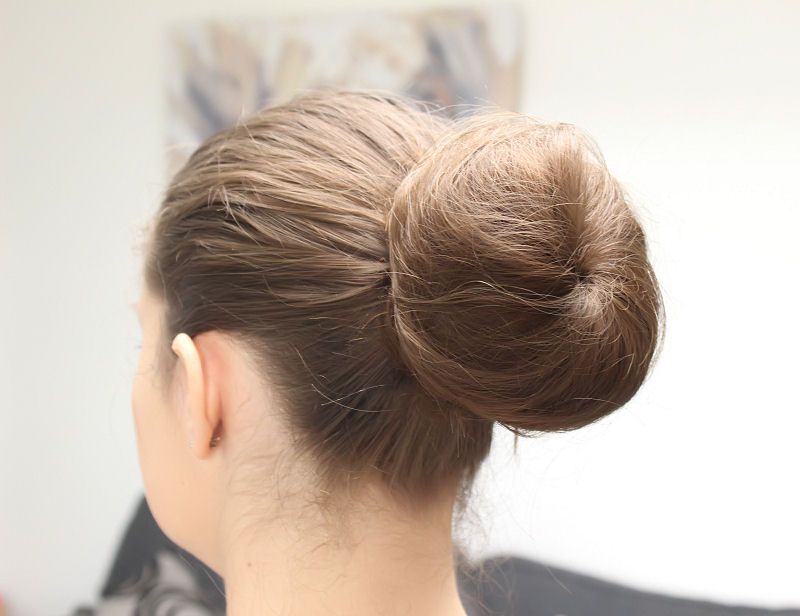
Tutorial | How to Create a Simple Bun Hairstyle


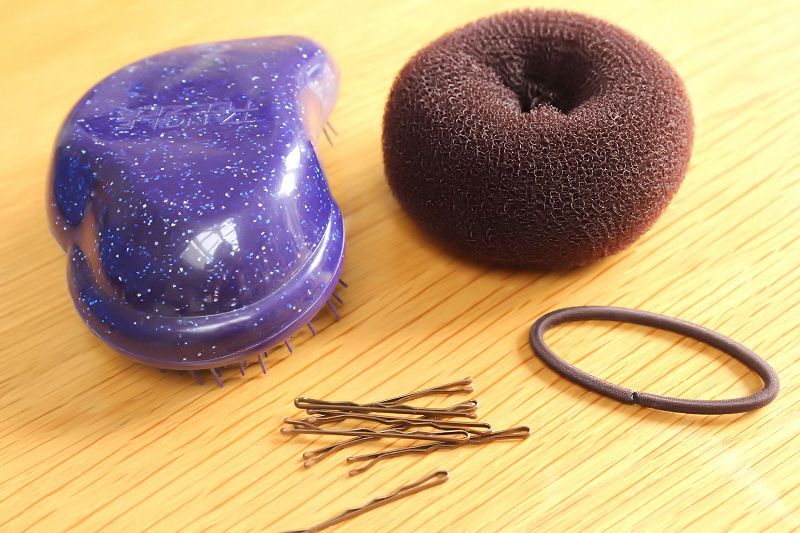
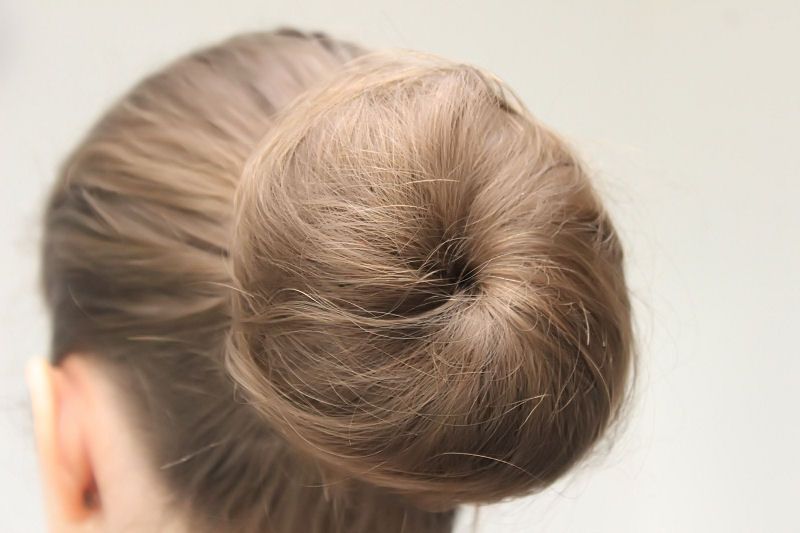
Tutorial: Bun Hairstyle Tutorial: Bun Hairstyle Tutorial: Bun Hairstyle Tutorial: Bun Hairstyle

Hello Everyone! Today's blog post is all about a simple everyday hair style you can re-create with minimal effort in only five-ten minutes.  It's perfect to wear during Spring and Summer when you want to keep your hair up out of your face and neck and looks great both during the day softened by pulling out some small strands of hair or in the evening blinged up to make it look a little more fancy. It's one of those hairstyles which is really versatile so whether you want to achieve a quick messy look or neatly finished you can!

What You Need:

- A brush
- Bobby Pins
- 1 Hair band
- 1 Bun Ring
- Hairspray

The Steps:

1) Brush your hair to remove any tangles
2) Scoop your hair into a pony tail and tie with the thin hair band. You can make it as tight or lose as you like and also experiment with where you want your bun. You don't have to have it up high like I have, it looks very pretty down low to the side too.
3) Put your pony tail through the bun ring so it is sitting at the base.  Grab your pony tail and fan it out a little before wrapping it over the edge of the bun ring to the other side and then wrapping it around. Make sure you cover all of the bun ring. This gets easier with practice.
4) Tuck the end of your hair under the bun ring and clip in place using the bobby pins. You can use as many as you like depending on how secure you need it to be. I usually use up to ten. To finish spray all over with hair spray.

Tips:

1) This works best one 1 day old hair as the grips stay in better
2) The bigger your pony tail the messier the effect and the easier it is to cover the bun ring so maybe think about using extensions, back combing your hair or using textured hair rather than straight.

What do you think of this hair style and tutorial?
Check out these great blogs by my lovely advertisers:

To advertise with Kimberley's Beauty Blog find out more info here
Sunday, 12 January 2014

VO5 Heat Defense Styling Spray Review


VO5 Heat Defense Styling Spray

VO5 Heat Defense Styling Spray

VO5 Heat Defense Styling Spray

Being a girl with long hair that is often subjected to a multitude of products and heat on a regular basis means I need to use a good heat protector.  Over the years I've tried out a lot of different brands but my favourite by far has been the VO5 Heat Protect Styling Spray.

The first thing that stands out about this product is the gorgeous bright pink packaging.  Being a big pink fan I always seem to gravitate towards these products first and is probably the reason why I first started using it (maybe not the best reason to try a product).  It claims to not only protect against heat but also leave your hair satin soft with an ultra shine finish so is a multipurpose product.

To use this heat protect product I simple spray all over towel dried hair before blow drying. I then section my hair and spray each one before straightening or curling my hair for extra protection.  As the formulation is so light I find I can easily use it several times on my hair without weighing it down or changing the texture.  The spray also allows even coverage so I don't end up with a mixture of wet and dry patches which is perfect.  As for the satin soft hair with ultra shine, I have to agree.  My hair is definitely left feeling soft after use and not in any way dry, crisp or sticky.  I can also see some extra shine which I love because it makes my hair look healthier.

The VO5 Heat Protect Styling Spray is one I go back to over and over again.  I have been tempted to use an alternative simply because I've gone through about five bottles of this product if not more and fancy a change but every time I go to buy a different one I resist because I know I can rely on this product and it works well with my hair type. If you want to give it a try you can buy it from Superdrug for £3.69.

What is your favourite heat protect spray?

| Twitter || Instagram || Blog Lovin' ||  You Tube |
 Check out these great blogs by my lovely advertisers:
Pink Pearl: MissLJBeauty

To advertise with Kimberley's Beauty Blog find out more info here

Tuesday, 24 December 2013

Scaredoo Tangle Hair Brush Review

Scaredoo Tangle Hair Brush

Scaredoo Tangle Hair Brush
Above: The 'Paddle' hair brush (apologies for the stray hair in this photo)

Scaredoo Tangle Hair Brush
Above: 3 tier bristle system to remove tangles

Having long luscious locks to tame can be a bit of a chore at times especially after washing it because I find my hair can be full of knots and tangles. Likewise, after sleeping on my hair if I haven't tied it up and have had a restless night my hair can look a little worse for wear.  My saviour, however, has got to be either my Tangle Tweezer or Scaredoo Hair brushes.  I have spoken about the Tangle Tweezer before so won't go into more details, if you want to read about it you can read the review here, instead this post will focus purely on the Scaredoo equivalent.

The Scaredoo hairbrushes are available in 5 bold colours but my favourite is definitely the hot pink and lilac one.  It's ergonomic design means I find this brush is light weight and comfortable to hold and due to it's compact size it fits nicely in my handbag so is great to take out and about with me.

This Scaredoo brush sports a unique flip and finish 2-in-1 brush system so it is perfect for removing tangles or simply brushing my hair. To use, you simply remove the lilac section of the brush, turn it over and slot it back into place. One side of the brush (the second picture above) shows your standard bristles which works as a normal hairbrush to glide through the hair ans is suitable for styling whereas the counter side has three tiers of bristles which when put into contact with the hair aim to remove tangles. 

I love this brush and think it would be suitable for both children and adults alike. I find it removed tangles in a pain free way, is easy to use and a great addition to my hair care routing.   It's a little late, being Christmas Eve but it would be the perfect stocking filler. You can buy the Pretty Pink Scaredoo Hairbrush from their website for £10.99.
| Twitter || Instagram || Blog Lovin' ||  You Tube |
 Check out these great blogs by my lovely advertisers:

To advertise with Kimberley's Beauty Blog find out more info here

Sunday, 13 October 2013

Celebrity Style // Who do you look like?

 
For the last couple of years I have often been compared to the Duchess of Cambridge, Kate Middleton because when I have my hair and make-up a certain way people can see a resemblance. Friends, people at work, my parents friends and complete strangers have often commented and I've even been advised to go to a lookalike agency, although I rarely see the similarities myself. 

I've never purposely tried to re-create any of her looks but it has got me thinking about how you can completely transform an outfit by simply wearing your hair and make-up in a different way and how you can easily achieve a completely image change temporarily.  For example, Kate often wears her hair in very loose, soft, subtle curls and has brunette hair so to get her look you would simple copy this or if you haven't got long brunette hair could invest in a hair piece such as 100% human hair wig from Pauls Hair World.  Makeup is just the same.  I've noticed Kate keeps her make-up looking very natural, I don't think I've ever seen a picture of her with a bright lip or heavy eye makeup.  Her look is very simple and classic, so if you want to have a similar look you can easily re-create it.  Conversely, you could go for more pronounced curls, tan, a natural lip and dark eye makeup to re-create o Cheryl Cole look or even darker eye makeup, a pink lip and flicked out blonde wavy curls for Holly Willoughby.

I think I will be taking more notice of how celebrities and people in the public eye I like style themselves and maybe try to re-create some of their looks on my blog or You Tube.

If you want to try transforming yourself into someone you admire in the public eye,  you can shop online at Pauls Hair World who offer a huge range of products that can completely change your image.

What celebrity or well known figure in the public eye do you look like or do you want to look like?

*Sponsored post

| Twitter || Instagram || Blog Lovin' ||  You Tube |


To advertise with Kimberley's Beauty Blog find out more info here

Saturday, 27 July 2013

Tutorial: Wrap around bun

Tutorial to Create a Wrap Around Bun

Hello Lovelies!

Today’s post is a tutorial on how to create a wrap around bun.  I will probably do a video tutorial for this too, if you want it?

This is the perfect summer hair style as it keeps you cool, is neat and tidy and quick and relatively easy to do. It stays in place all day so you don't need to worry about having to touch it up and is suitable for both day and evening wear.  You can add extra accessories to this look too/

Here’s what you need:

1)      A bun ring
2)      Bobby pins
3)      Hair brush
4)      Hairspray
5)      1 thin hair band

Here’s what to do:

1. Brush your hair up into a pony tail and tie it in place using your thin hair band.  Make sure you remove all lumps and bumps as you will not be able to do this later. 
2. Put your bun ring over the pony tail so it is sitting at the base i.e. on top of the hair band
3. Hold onto your pony tail at the base (above the bun ring) and gently pull it so it is wider.
4. Start wrapping your pony tail around the bun ring holding it in place with one hand and wrapping with the other.  Occasionally pull the hair which is on the inside of the bun ring tighter to get a neater finish that covers the entire bun ring.
5. Continue wrapping your hair around the bun until you reach the end.  Once you have, tuck the tips of your hair under the bun ring.
6. At this point you have a perfectly formed bun that looks like it will stay in place but looks can be deceiving.  You now need to insert bobby pins around the base of your hair to make sure you bun will stay in place all day.  I use maybe around ten but use as many as you require… there is not limit.
7. Finally spray your bun with hairspray to help stop any flyway's and get everything in place.  If you want the hair on the head to also be smooth, spray a little hairspray onto your hands and smooth them over your head.  This will keep flyway's at bay whilst still maintaining a soft finish to the hair.

Note: To go for more of a messy version of this style here are some tips:

1)      User your finger tips to pull your hair up into the pony tail instead of a brush
2)      Tie your pony tail as loosely as possible
3)      Don’t be quite as tidy when wrapping your hair around your bun.

What do you think of this look?
 
| Twitter ||  Instagram || Blog Lovin' || You Tube |

Friday, 17 May 2013

James Brown Photo Fabulous Volumising Mousse Review

Hello Everyone!

I hope you are all well.  As I've mentioned many times before, I have fine hair so I am always looking for ways to add volume.  A product I have used on and off for years is mousse and the one I will be reviewing today is the James Brown Photo Fabulous Volumising Mousse.

The packging of the product is different from anything else on the market which really makes it stand out on the shelf.  Rather than going for your typical pinks or pastel's they have used black with neon orange which makes the packaging edgy and funky.


* some of the wording is chopped off in the above pic as I didn't originally plan to make a collage.

The texture of the James Brown volumising mousse is your typical white foam which expands in your hand.  It's scent is nice and lingers on your hair...it reminds me of the hair products used in salons. I'm sitting here with my boyfriend trying to work out how to describe this smell and we've both come to the conclusion it is unlike any other products and pretty hard to put your finger on.  My attempt would be a sweet, floral, musky fragrance which isn't overpowering.

This product works consistenly when teamed with a variety of shampoo's are conditioners (such as Elvive, James Brown and Charles Worthington) and can be used to add volume to the roots and length of your hair as well as create a messy, beachy waves look (read the tutoral here).

I apply the James Brown mousse to towel dried hair upside down.  I find this allows me to evenly distribute the product easier as I start from root to tip.  Following this I simply brush through my hair and dry it as normal.

There are two key things to remember when using mousse:
  1. Shake, shake, shake - You need to throughly shake mousse so when you pump it out it turns into a foam which expands rather than a wet mess. If you don't do this you won't get the volume you want.
  2. Quantity - Mousse can make your hair sticky if you use too much of it so you need to make sure you don't go overboard. It is very much down to trial and error but to give you a rough idea this is how much I use for my length hair:

I really like this product and I've been using it every time I have washed my hair for around two months.  If you use the correct quantity it doesn't leave your hair sticky or flat but I have found it does dry out my hair a little.  To fix this, I make sure I apply moroccan oil (read the review here).

What do you think of mousse? How do you add volume to your hair?

| Twitter || Facebook || Instagram || Blog Lovin' || BaoBella || She Said Beauty || You Tube |

If you like my blog please nominate my blog for the Best New Beauty Blog.   It would really make my year! Click HERE!

Kimberleys Beauty Blog
.

Saturday, 27 April 2013

Tutorial // Beachy Waves with NO Heat

I've been wanting to include tutorial type posts on my blog since I started it but it is a little awkward to do them because it's much easier to show someone how to do it than describe it.  However, today's tutorial is so simple it is something that can be captured in a blog post rather than a video so here are the steps I take to get beachy waves with no heat.

First of all, here's a sneak peak of the products I use to get this look (I have omitted shampoo and conditioner):

Beachy Waves Tutorial products

 Moroccan Oil - This product smells A-mazing and I use it to nourish my hair, make it dry quicker and also leave my hair smooth and shiny. Read the review here.
 James Brown Mousse - This is another lovely smelling product and I use it to add volume to my hair.
 Tony and Guy Sea Salt Spray- I use this product to add texture and body to my hair, this is what creates the beachy waves.

So to create natural looking beachy waves I do the following:

1. Wash my hair
2. Leave my hair to dry in a towel for around 15-20 minutes. I do this so it is still very damp but not soaking wet.
3. I use my Tangle Teezer to brush through my hair.
4. Apply two pumps of Moroccan oil onto my hair, concentrating on the tips upwards (but not the roots).  Note, if you have shorter hair then use less of this product.
5. I use around a golf ball size of mousse starting at the roots and working down.  I first do this standing up and after I put my hair upside down and run any excess I have through it. Remember to shake your mousse really well before you use it!
5. I brush my hair through again with my paddle brush or tangle teezer
6. I then generously spray the sea salt spray evenly, all over my hair
7. Finally, I separate my hair into two sections and plait them reasonably tightly, so basically I've got two bunches/pig tail plaits.  It isn't the best of looks but it doesn't look so well with only one plait.

I then just sit and wait for my hair to dry naturally.  When it is almost there and if I'm feeling impatient I will un-plait it and leave it loose so it dries a bit quicker but only when the majority is dry already otherwise you won't get the beachy waves.

Once my hair is dry, I simply brush it through (if it needs it) and apply some more Moroccan oil (only a tiny bit) to define the waves.

This is what I end up with:


What do you think of this look? Do you think you'll try it?

 
| Twitter ||  Instagram || Blog Lovin' || You Tube |